Cleaner Robot Tutorial
This tutorial builds one visual robot using the same managed package path used
for a real robot. The provided script starts only the simulation world and
browser view. Individual robot subsystems are started with librux launch run
while you learn each layer. The full robot is reconciled with
librux deploy up after the platform and application are defined.
What You Will Build
The platform is a set of managed subsystem packages.
cleaner_2d
  gateway.device_gateway   simulator-backed gateway subsystem over standard contracts
  component.mobile           mobile-base component subsystem
  component.manipulation     manipulator component subsystem
  component.gripper          gripper component subsystem
  component.perception       perception component subsystem
  compound.cleaner           compound subsystem
The same platform can run two application packages.
| Application | Behavior |
|---|---|
app.cleaner.teleop |
operator drives, collects, and burns trash |
app.cleaner.radar |
range-limited perception-driven app searches for detected trash |
Execution Flow
simulator/ and frontend/ are tutorial infrastructure. They are not Librux
subsystems. The Librux robot starts at the gateway subsystem boundary.
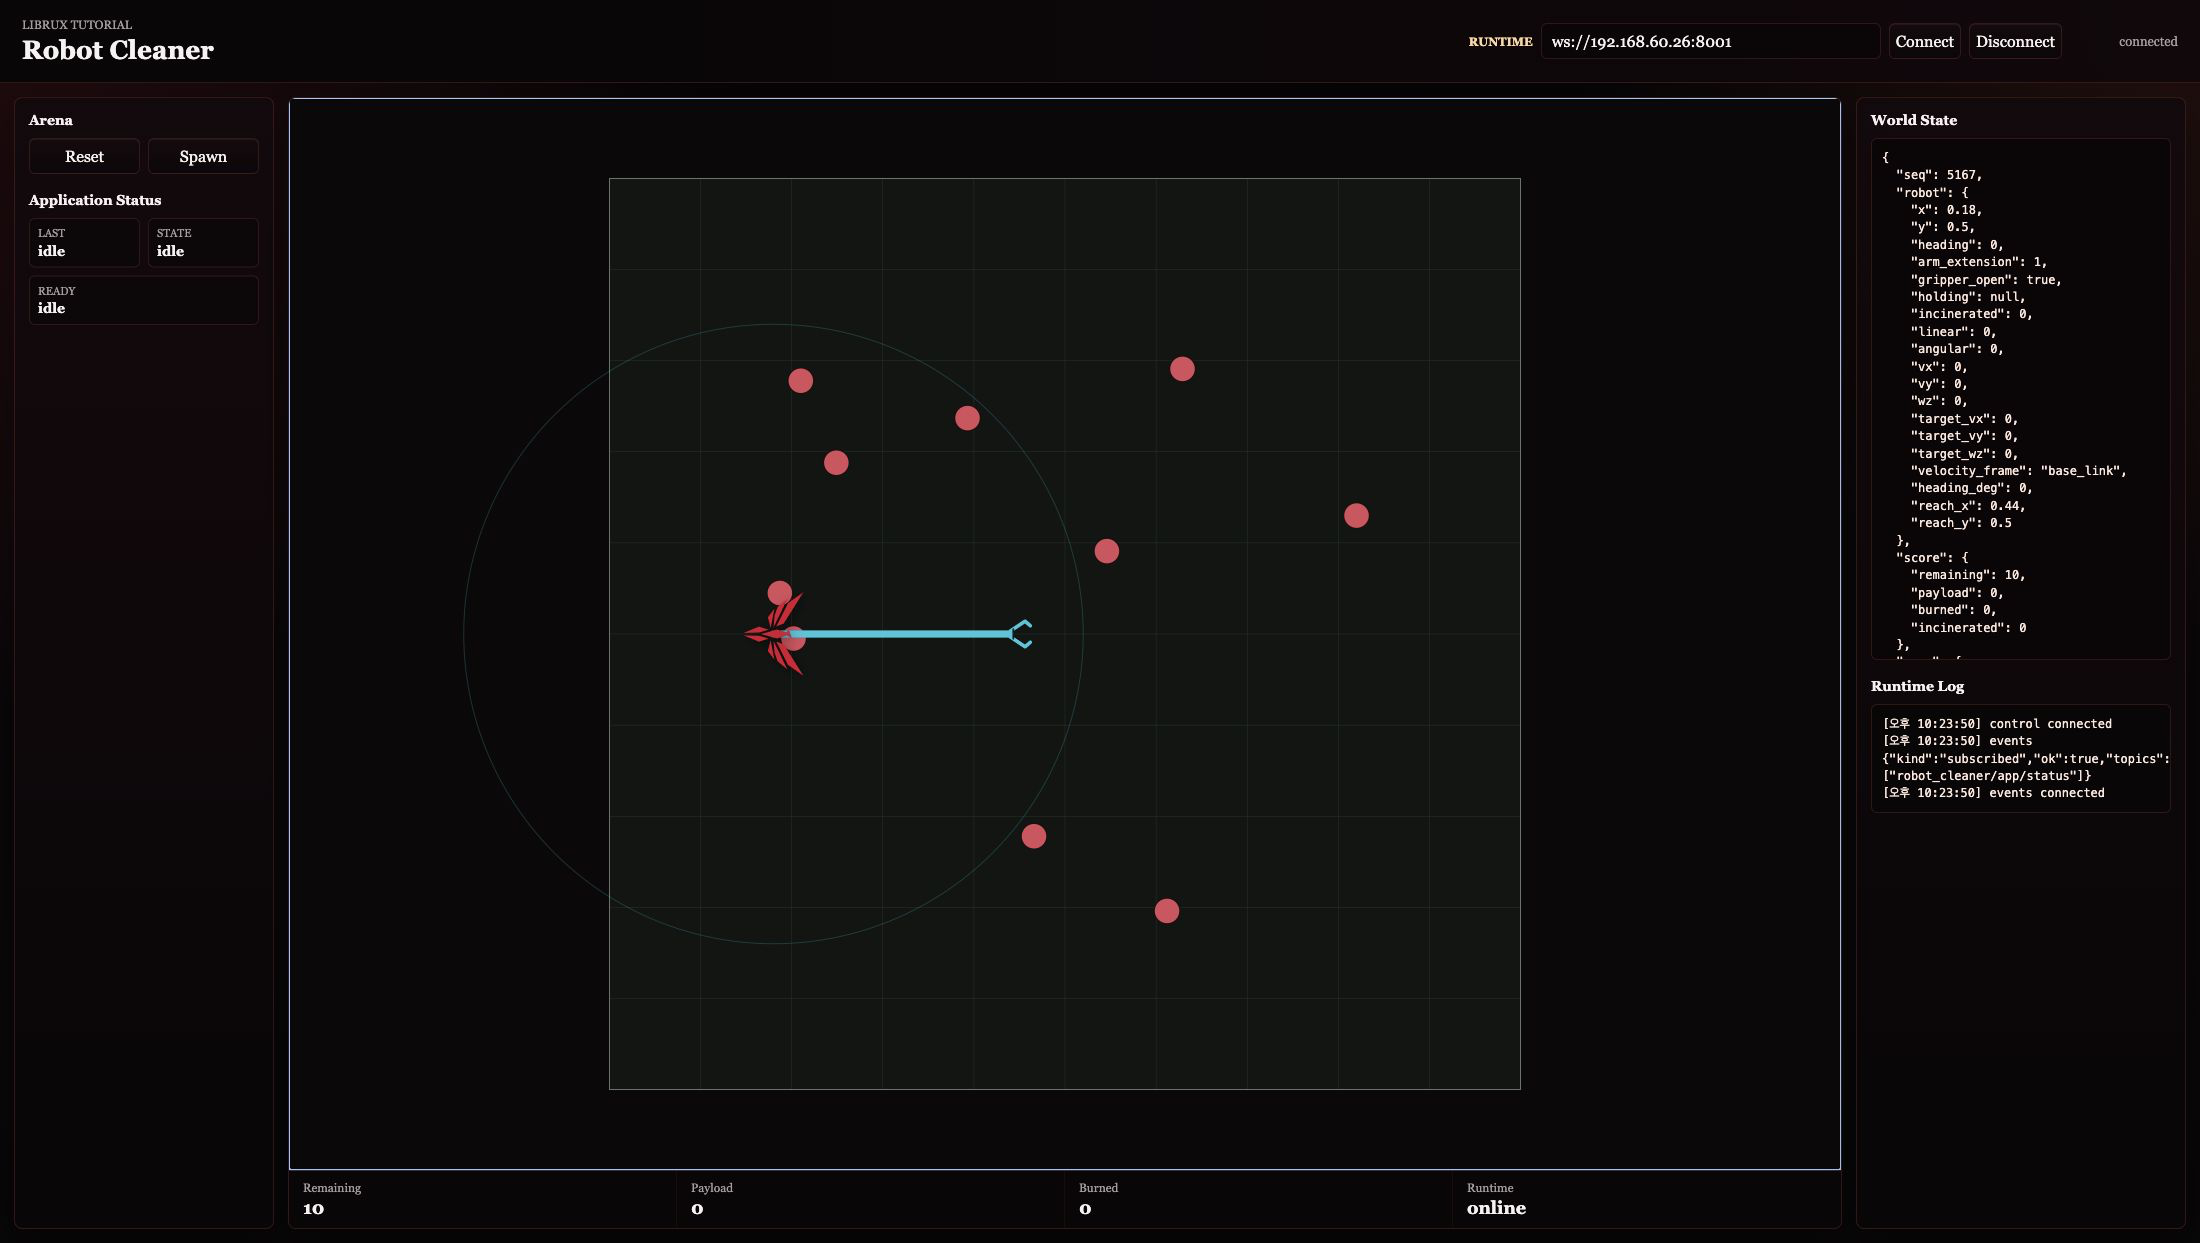
The visible tutorial uses two browser surfaces.
| Surface | Where it appears | Purpose |
|---|---|---|
| World viewer | http://<runtime-host>:8091/ |
simulator display, reset/spawn controls, app status observer |
| Package frontend | Runtime card for an installed package instance | operator controls owned by that application package |
In the advanced teleop step, keep both surfaces open side by side. The world viewer shows what the robot is doing, and the teleop frontend sends commands through the managed package frontend proxy.
Launch Modes In This Tutorial
There are three ways you may see cleaner code run.
| Mode | Use | What Librux manages |
|---|---|---|
python3 path/to/subsystem.py |
source-level debugging while editing one subsystem | subsystem registration only |
librux launch run <package> |
normal single-subsystem tutorial execution | package validation, resource lease, runtime env, lifecycle handle |
librux deploy up <deployment> |
full robot and application execution | desired-state reconciliation across package instances |
Direct Python execution can still register a subsystem with the control backend
when you pass the right manifest and binding arguments. It is useful
for IDE/debugger work, but it is not a managed robot subsystem. It does not get
a launcher resource lease, package validation, package runtime directory, or
librux launch list/status/stop lifecycle management.
For that reason, the tutorial uses librux launch run while building
individual layers and introduces librux deploy up only after the compound
subsystem layer, platform, and application are defined.
Steps
| Step | Page | Primary command |
|---|---|---|
| 1 | Start Simulation World | python3 tutorials/run_sim_world.py |
| 2 | Build Gateway Subsystem | librux launch run tutorials/subsystems/gateway.device_gateway --instance gateway.device_gateway --set simulator.url=http://127.0.0.1:8092 --detach |
| 3 | Add Component Subsystems | librux launch run ... --bind ... --detach |
| 4 | Define Platform | librux launch run tutorials/subsystems/compound.cleaner --bind ... --detach |
| 5 | Run Applications | librux deploy up tutorials/deployments/radar.deployment.yaml --replace |
Advanced topics after the robot is moving.
| Topic | Page |
|---|---|
| Package layout | Subsystem Packages |
| Managed teleop frontend | Teleop Package Frontend |
| Resource control for managed packages | Resource Policy |
| Multi-host cleaner topology | Federation |
Repository Layout
tutorials/
  simulator/                 provided simulation world
  frontend/                  browser world viewer
  robot/
    librux.robot.yaml        robot manifest: parts, slots, capabilities
  subsystems/                subsystem package roots
    component.mobile/        role=component package that implements the mobile-base component contract
    app.cleaner.teleop/      application subsystem package with managed package frontend
    app.cleaner.radar/       application subsystem package
  deployments/               deployment manifests for staged and app runs
  run_sim_world.py            simulation/frontend bootstrap only
Deployment files are split by purpose.
| Path | Level | Purpose |
|---|---|---|
deployments/stages/gateway.deployment.yaml |
subsystem composition | start only the simulator-backed gateway subsystem |
deployments/stages/components.deployment.yaml |
subsystem composition | start gateway plus component subsystems and validate their bindings |
deployments/stages/robot.deployment.yaml |
platform bring-up | validate and run the app-less platform |
deployments/teleop.deployment.yaml |
full robot application manifest | validate or headlessly run the platform with the teleop app |
deployments/radar.deployment.yaml |
full robot application | run the platform with the perception-driven app |
deployments/dev/*.deployment.yaml |
external subsystem composition | binding data for source-level debugging where processes are started outside deploy up |
The stages/gateway and stages/components files intentionally omit
robot. They are partial subsystem compositions, not full robot deployments.
stages/robot includes robot but no application, so it checks the
app-less platform. The top-level app deployments include both robot and
application. The teleop browser controls use the Package install plus Runtime
launch path because package frontend URLs are tied to launched package
instances.
Start Here
Use an installed Librux runtime.
. /opt/librux/env.sh
librux system status
Check Python SDK availability from the installed runtime.
. /opt/librux/env.sh
python3 -c 'import librux; print("Librux Python SDK ready")'
The installed env.sh exposes the unpacked SDK runtime used by managed
packages. Use a virtual environment or a matching source checkout only for
editable SDK development, as described in
Developer Guide.
Then start the visible world.
cd /opt/librux
python3 tutorials/run_sim_world.py
Open this URL.
http://127.0.0.1:8091/
If Librux is running on a remote host and your browser is on another machine, bind the tutorial world to the host interface instead.
python3 tutorials/run_sim_world.py --host 0.0.0.0
Then open http://<runtime-host>:8091/. Step 1 explains the remote host and
SSH forwarding options.
Continue to Step 1 - Start Simulation World.